

SCHOOL OF INSULATION - LESSON 3 - Reinforcing Layer Execution
LESSON 3
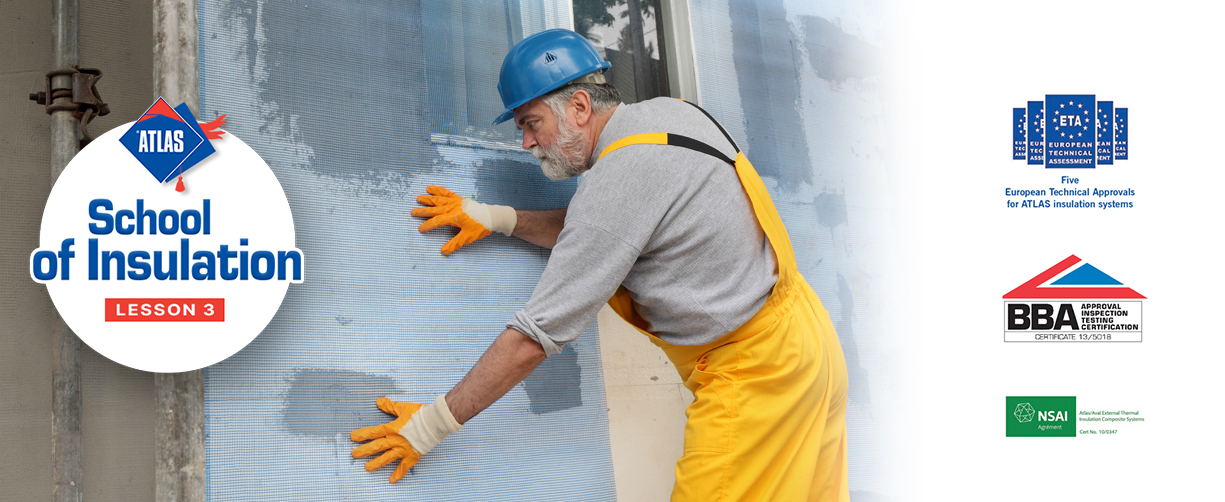
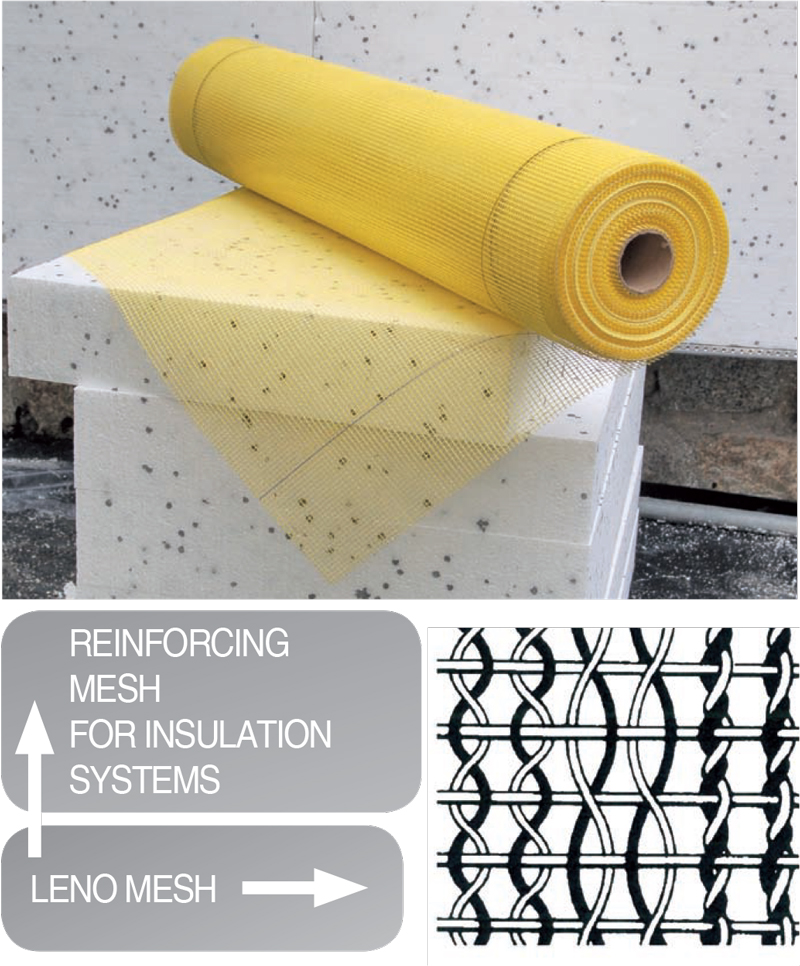
REINFORCING LAYER EXECUTION
In previous lessons, we have shown how to properly prepare the substrate for insulation and how to install insulation layer (wool or polystyrene). Today we want to show how to properly execute the next phase of insulation - installation of the reinforcing layer (basecoat). It consists of application of proper adhesive and embedding mesh on the insulation already installed. Proper execution of reinforcing layer and the correct choice of materials for its installation is very important because it determines the durability of the entire thermal insulation system and its aesthetic appearance.
The role of mesh can be compared to the role of steel in reinforced concrete ceiling and the proper adhesive to the appropriate class of concrete.
![]()
The best is to accept the assumptions set out in the project documentation, where either specific adhesives and type of mesh are given or parameters of different materials listed. But what if we do not have such documentation? A good solution is to contact the Atlas Technical Advisor who will help you in selecting appropriate materials for a particular project. To carry out the reinforcing layer all kinds of reinforcing mesh listed in the technical specifications or recommended by the manufacturer of adhesives can be used. Remember that each product of good quality must keep proper price and avoid buying non-system ‘suspiciously’ cheap meshes. In most cases it brings more problems than benefits.
When choosing the adhesive on your own, first consider what type of insulation has been used and what kind of project you have (newly built house - insulation of an old one, large building small building, location of the building, etc.). It is recommended to use products of one manufacturer, as they are usually tested in different combinations and work well together. What adhesive to choose we show on the example of ATLAS/AVAL products.
Adhesives for mesh on the polystyrene substrate:
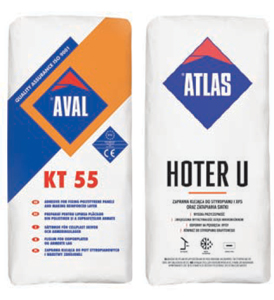
ATLAS HOTER U / AVAL KT 55 – general use adhesive for the execution of the reinforcing layer (basecoat) on polysty-rene and for polystyrene application. Recommended for insulation and thermomodernization of all types of buildings of height up to 12 m. Reinforced with microfibres.
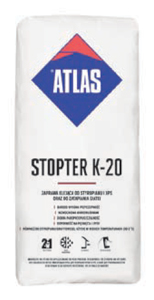
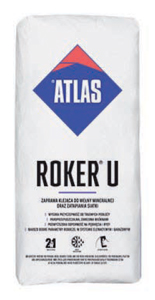
ATLAS STOPTER K-20 –another adhesive of type 2-in-1, which can be freely used for all types of buildings, both to perform the reinforcing layer (basecoat) and polystyrene application. Enriched with microfibres, allows work in high humidity and ambient temperature from 0 °C up to 25 °C.
Adhesives for mesh on the mineral wool substrate:
ATLAS ROKER U – adhesive for application of wool panels and execution of the reinforcing layer (base-coat); designed for all types of buildings insulated with mineral wool.
When the proper adhesive and mesh were bought, you can start the basecoat execution. The work should begin 24 – 48 hours after the insulation application. This time can vary due to weather conditions during the insulating works and the type and quality of the substrate. The basecoat execution is divided into two stages.
![]()
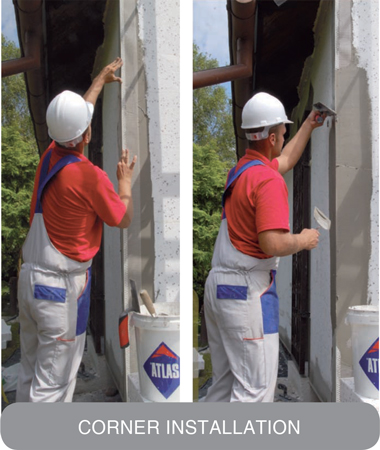
Before the application of main reinforcing layer of the entire wall we need to protect of the places most vulnerable to mechanical damage, such as the edges of the building and the edges and corners of window and door reveals. Edges are protected with special corner profiles additionally strengthened with mesh, which reinforce the corners of polystyrene or wool. In corner profiles selection, as well as the choice of mesh or adhesive, you should follow the system manufacturer’s recommendations or consult with the manufacturer’s Technical Advisor.
Before the corner profile application, make sure that the edges are vertical. If so, apply the adhesive to the edge of the wall with a continuous strip with the use of a notched trowel and paste the corner. If not, apply the adhesive in points with a spatula, and, after adding a corner , adjust the vertical deflection resulting from un even insulation layer. When a vertical edge is achieved, apply the adhesive on the entire surface of the corner and float it smoothly.
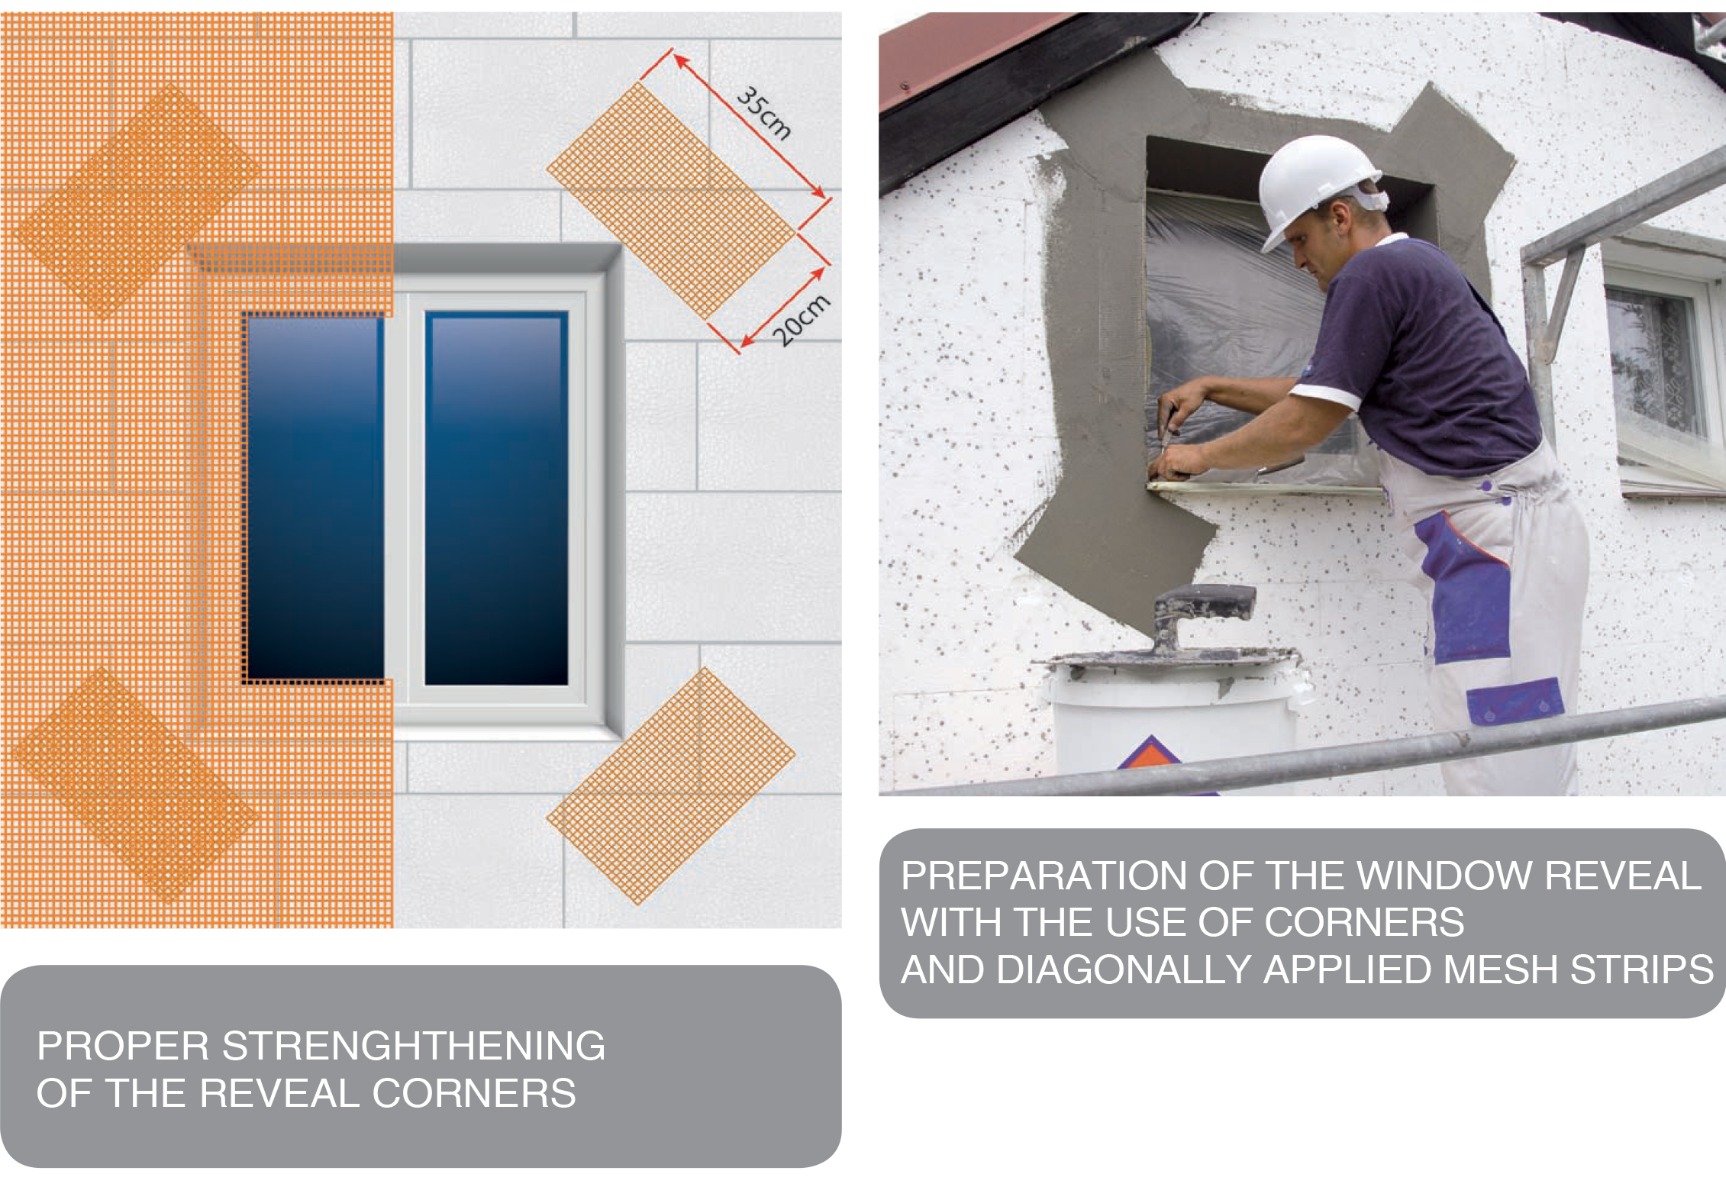
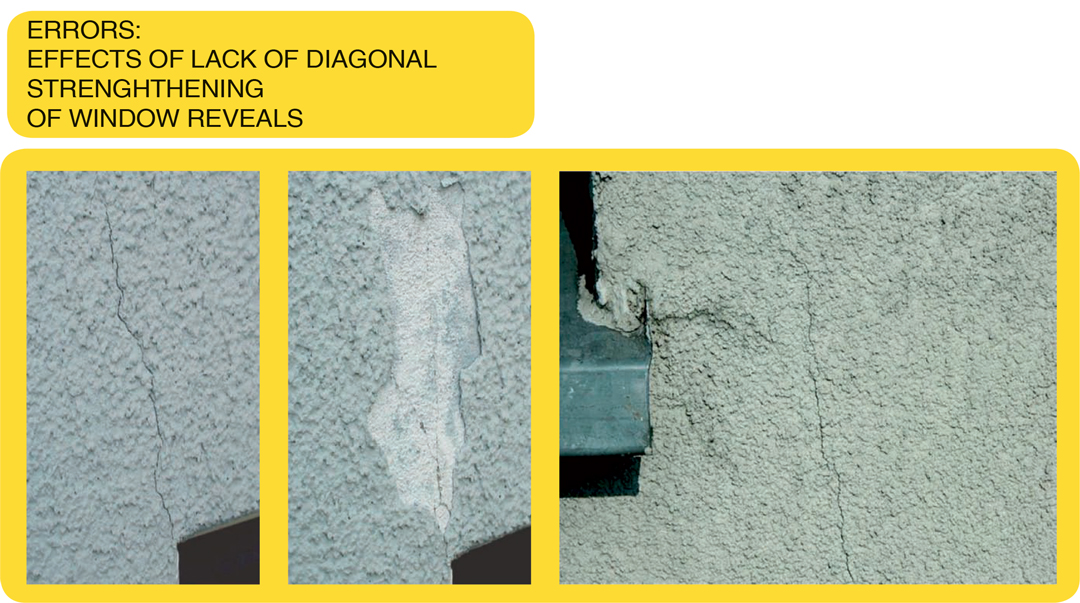
When you have secured all the edges, strengthen additionally the corners of window and door reveals. This phase consists of application of additional 20x35 cm strips of reinforcing mesh at each reveal corner. Strips are applied diagonally at a 45° angle.
This procedure is intended to avoid cracks that can appear even after a long time and can be seen directly on the finishing coat (render) layer.
![]()
After securing sensitive elements of the façade you can proceed to the reinforcing layer installation over the entire facade. Note! Various stages of reinforcing layer execution should be done in one operation.
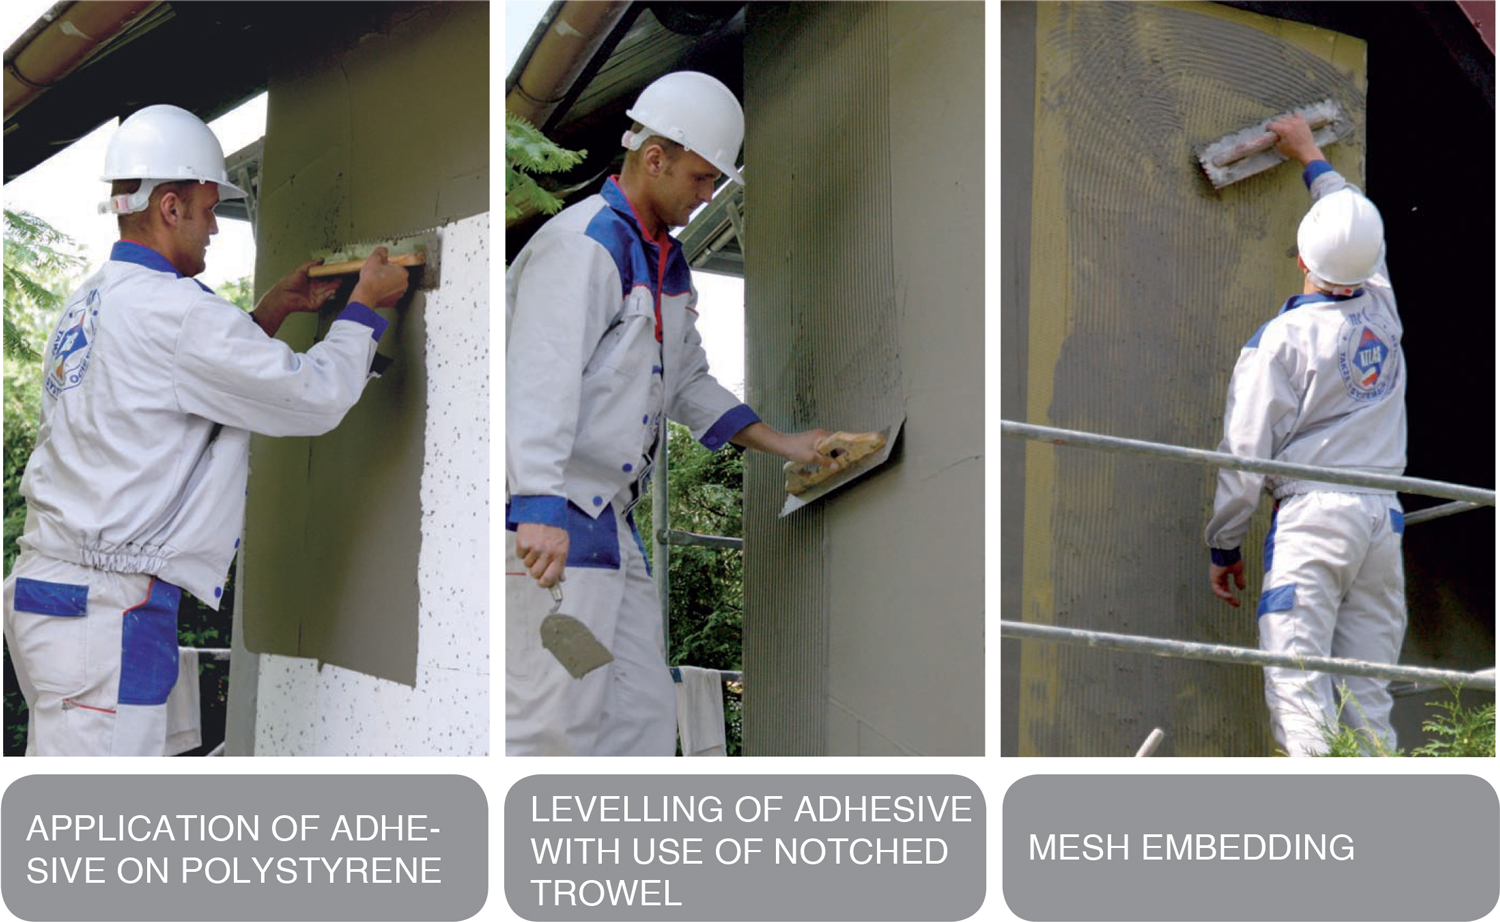
The first step is to prepare reinforcing mesh strips which, if necessary, should be cut to appropriate length and width. Then, a layer of adhesive (in the amount of 2/3 of the total quantity) is applied and spread evenly on the board/panel surface with a notched trowel (tooth 10-12 mm). The adhesive layer area should be slightly greater than the cut strip of the reinforcing mesh.
The reinforcing mesh should be immediately laid on such prepared layer, then embedded in the adhesive and floated smoothly with the use of steel trowel. The
mesh should be completely immersed in the adhesive and invisible. If the layer of adhesive pressed form under the mesh does not allow full alignment and mesh
embedding, apply another layer of adhesive in order to achieve an even surface, which will be a substrate for the next layer, which will be a render. The key issue is to apply an additional layer of adhesive before setting and drying of the first layer, using the ‘wet-on-wet’ method. Application of a new adhesive layer on a dry and set basecoat is not allowed.
Then, repeat all the steps for the next mesh strip. Reinforcing mesh should overlap at joint by a minimum coverage of 10 cm (the exact width of the overlaps is given by the system manufacturer in the technical specifications), or move out beyond the edges of window and door reveals. If you cut the mesh (e.g. in the treatment of protruding elements) reinforce this part with an additional mesh strip embedded in adhesive. Reinforcing mesh should extend beyond the corners and the starting track and cut evenly on edges. We proceed this way until the entire wall surface is completed.
The quality of workmanship of the thermal insulation basecoat is an important element influencing the final façade appearance. It determines the appearance of a render applied in the final phase of insulating.
Related Products
-
![Polystyrene insulation render fixing plug LTX 10x120mm]() Polystyrene insulation render fixing plug LTX 10x120mm£0.24 / pcs £0.20 / pcs£0.20 / pcs£0.17 / pcs
Polystyrene insulation render fixing plug LTX 10x120mm£0.24 / pcs £0.20 / pcs£0.20 / pcs£0.17 / pcs -
![Plastic Cutter WK-FT for Styrofoam panels]()
-
![silicone-render-ATLAS]() Silicone render Atlas SAH N15 dotted white 25kg£71.40 / bucket £59.50 / bucket£61.20 / bucket£51.00 / bucket
Silicone render Atlas SAH N15 dotted white 25kg£71.40 / bucket £59.50 / bucket£61.20 / bucket£51.00 / bucket