

How to install base starter track for insulation boards?
Installing a base starter track for insulation boards is an important step in the process of adding external insulation to a building. The base starter track provides a level and secure base for the insulation panels.
Here's a general guide on how to install a base starter track for insulation boards:
Materials and Tools
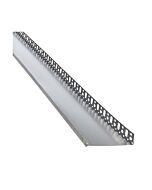
- Base starter track
- Appropriate fixings (screws, anchors, etc.)
- Spirit level
- Tape measure
- Hammer drill or power drill
- Screwdriver or impact driver
- Safety equipment (gloves, safety glasses)
Procedure
1. Prepare the Surface:
- Ensure that the surface where you will install the base starter track is clean, dry, and free from any debris or obstacles. If necessary, repair any damage to the existing wall surface.
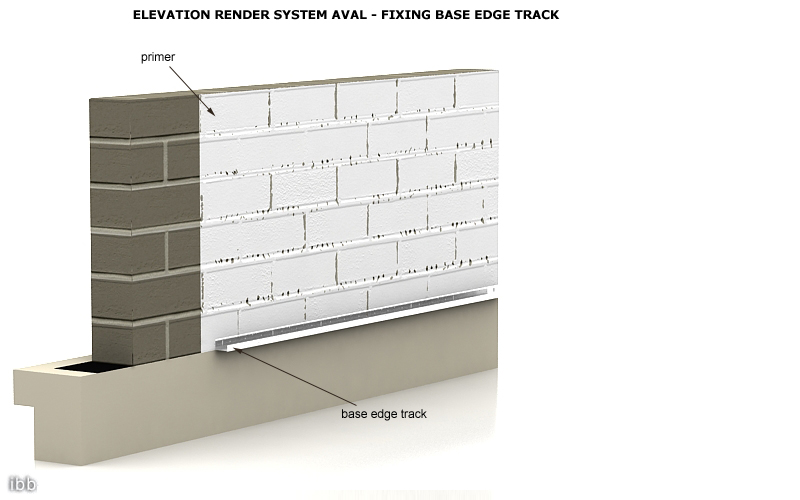
2. Measure and Mark:
- Use a tape measure to determine the position of the base starter track. Typically, it is installed at the bottom of the wall, flush with the ground. Measure and mark the locations where you will place the track, ensuring that it is level.
3. Install Damp Proof Course (DPC):
- If required, install a damp proof course (DPC) at the base of the wall before attaching the base starter track. This helps prevent moisture from rising through the wall.
4. Cut the Base Starter Track:
- If the base starter track is not already cut to the required length, use appropriate tools (e.g., a saw) to cut it to the necessary size.
5. Align and Level:
- Position the base starter track along the marked lines, ensuring it is level. Use a spirit level to check for horizontal alignment. Make adjustments as needed.
6. Mark Fixing Points:
- Once the base starter track is correctly positioned, mark the fixing points on the wall. This is where you will drill holes for the fixings.
7. Drill Holes:
- Use a hammer drill or power drill to drill holes at the marked fixing points. The drill bit size should be appropriate for the type of fixings you are using.
8. Attach the Base Starter Track:
- Place the base starter track back into position and secure it to the wall by inserting the appropriate fixings (screws, anchors, etc.) through the holes and into the drilled wall. Tighten the fixings securely.
9. Check for Stability:
- After attaching the base starter track, double-check its stability and alignment. Ensure that it is securely fixed to the wall and level.
10. Repeat for Additional Sections:
- If the length of the wall requires multiple sections of base starter track, repeat the process for each section, ensuring proper alignment and fixing.
Proceed with Insulation Installation
Always follow the specific instructions provided by the insulation system manufacturer, as installation procedures may vary based on the type of insulation and base track system used.