

Dry Lining Guide - walls and ceilings
Understanding house structural elements like walls and ceilings is vital to deciding which option is the most suitable when undertaking a repair or alternation work. Briefly, ceilings can have either a timber or concrete structure. Walls can be loadbearing or non-loadbearing, either cavity or single-skin. There is a variety of ways that ceilings and walls may be finished. In this section, we will describe various installation techniques of the metal and timber frame systems for both walls and ceilings.
CEILINGS
1/. Timber system ceiling
Firstly it is important to note that this is an old-fashioned ceiling installation method. It is not recommended nowadays as it is not effective enough due to load transferring, being less resilient to cracks, absorbing moisture quickly or being more difficult to level correctly.
Timber system ceilings can be constructed with the use of battens. Using spirit level or another levelling tool, mark guidelines on walls for the new ceiling. To level the ceiling, attach battens to joists and noggings of the existing ceiling structure. Attach plasterboards to battens with dry lining screws. Follow the same technique to construct a new timber system ceiling.
2/. Metal frame ceiling
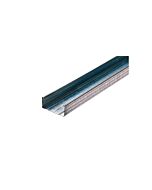
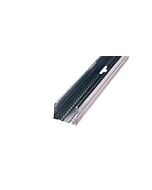
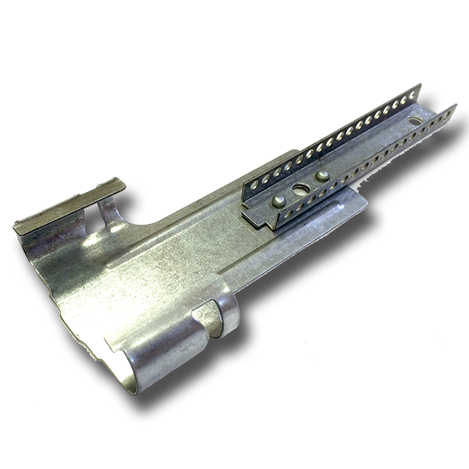
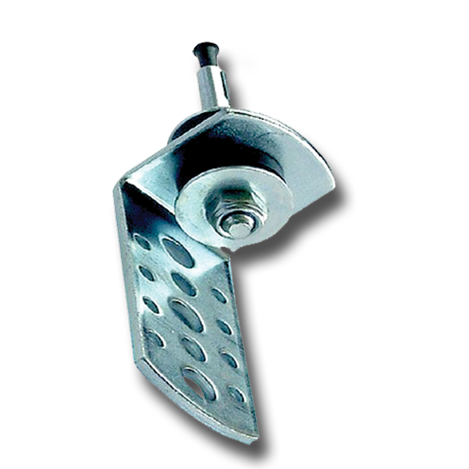
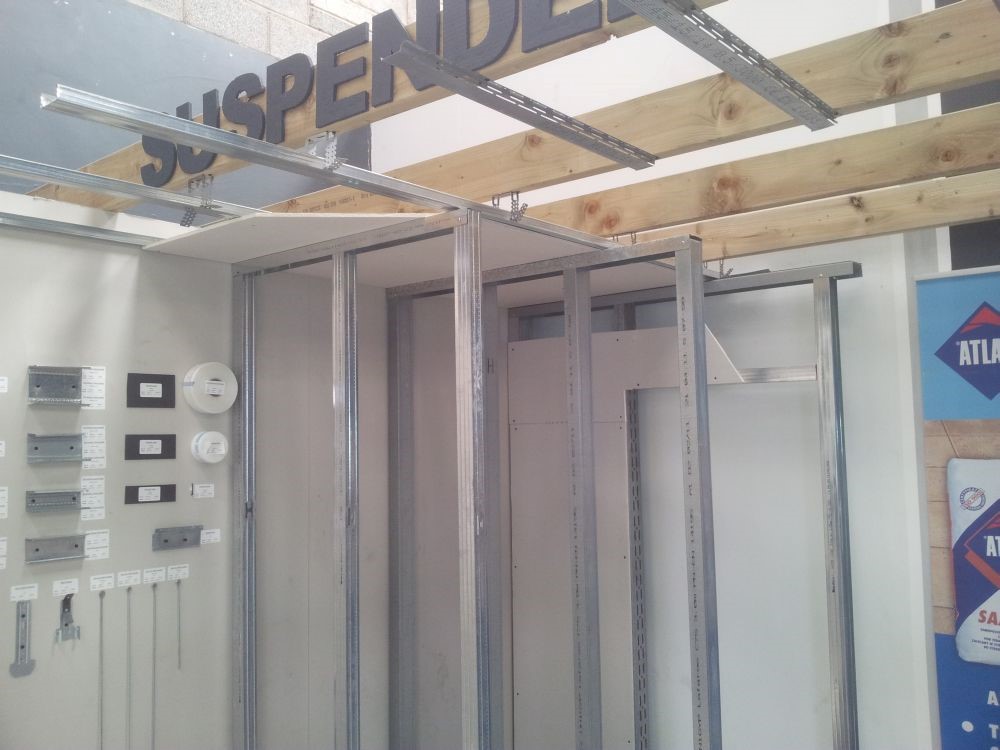
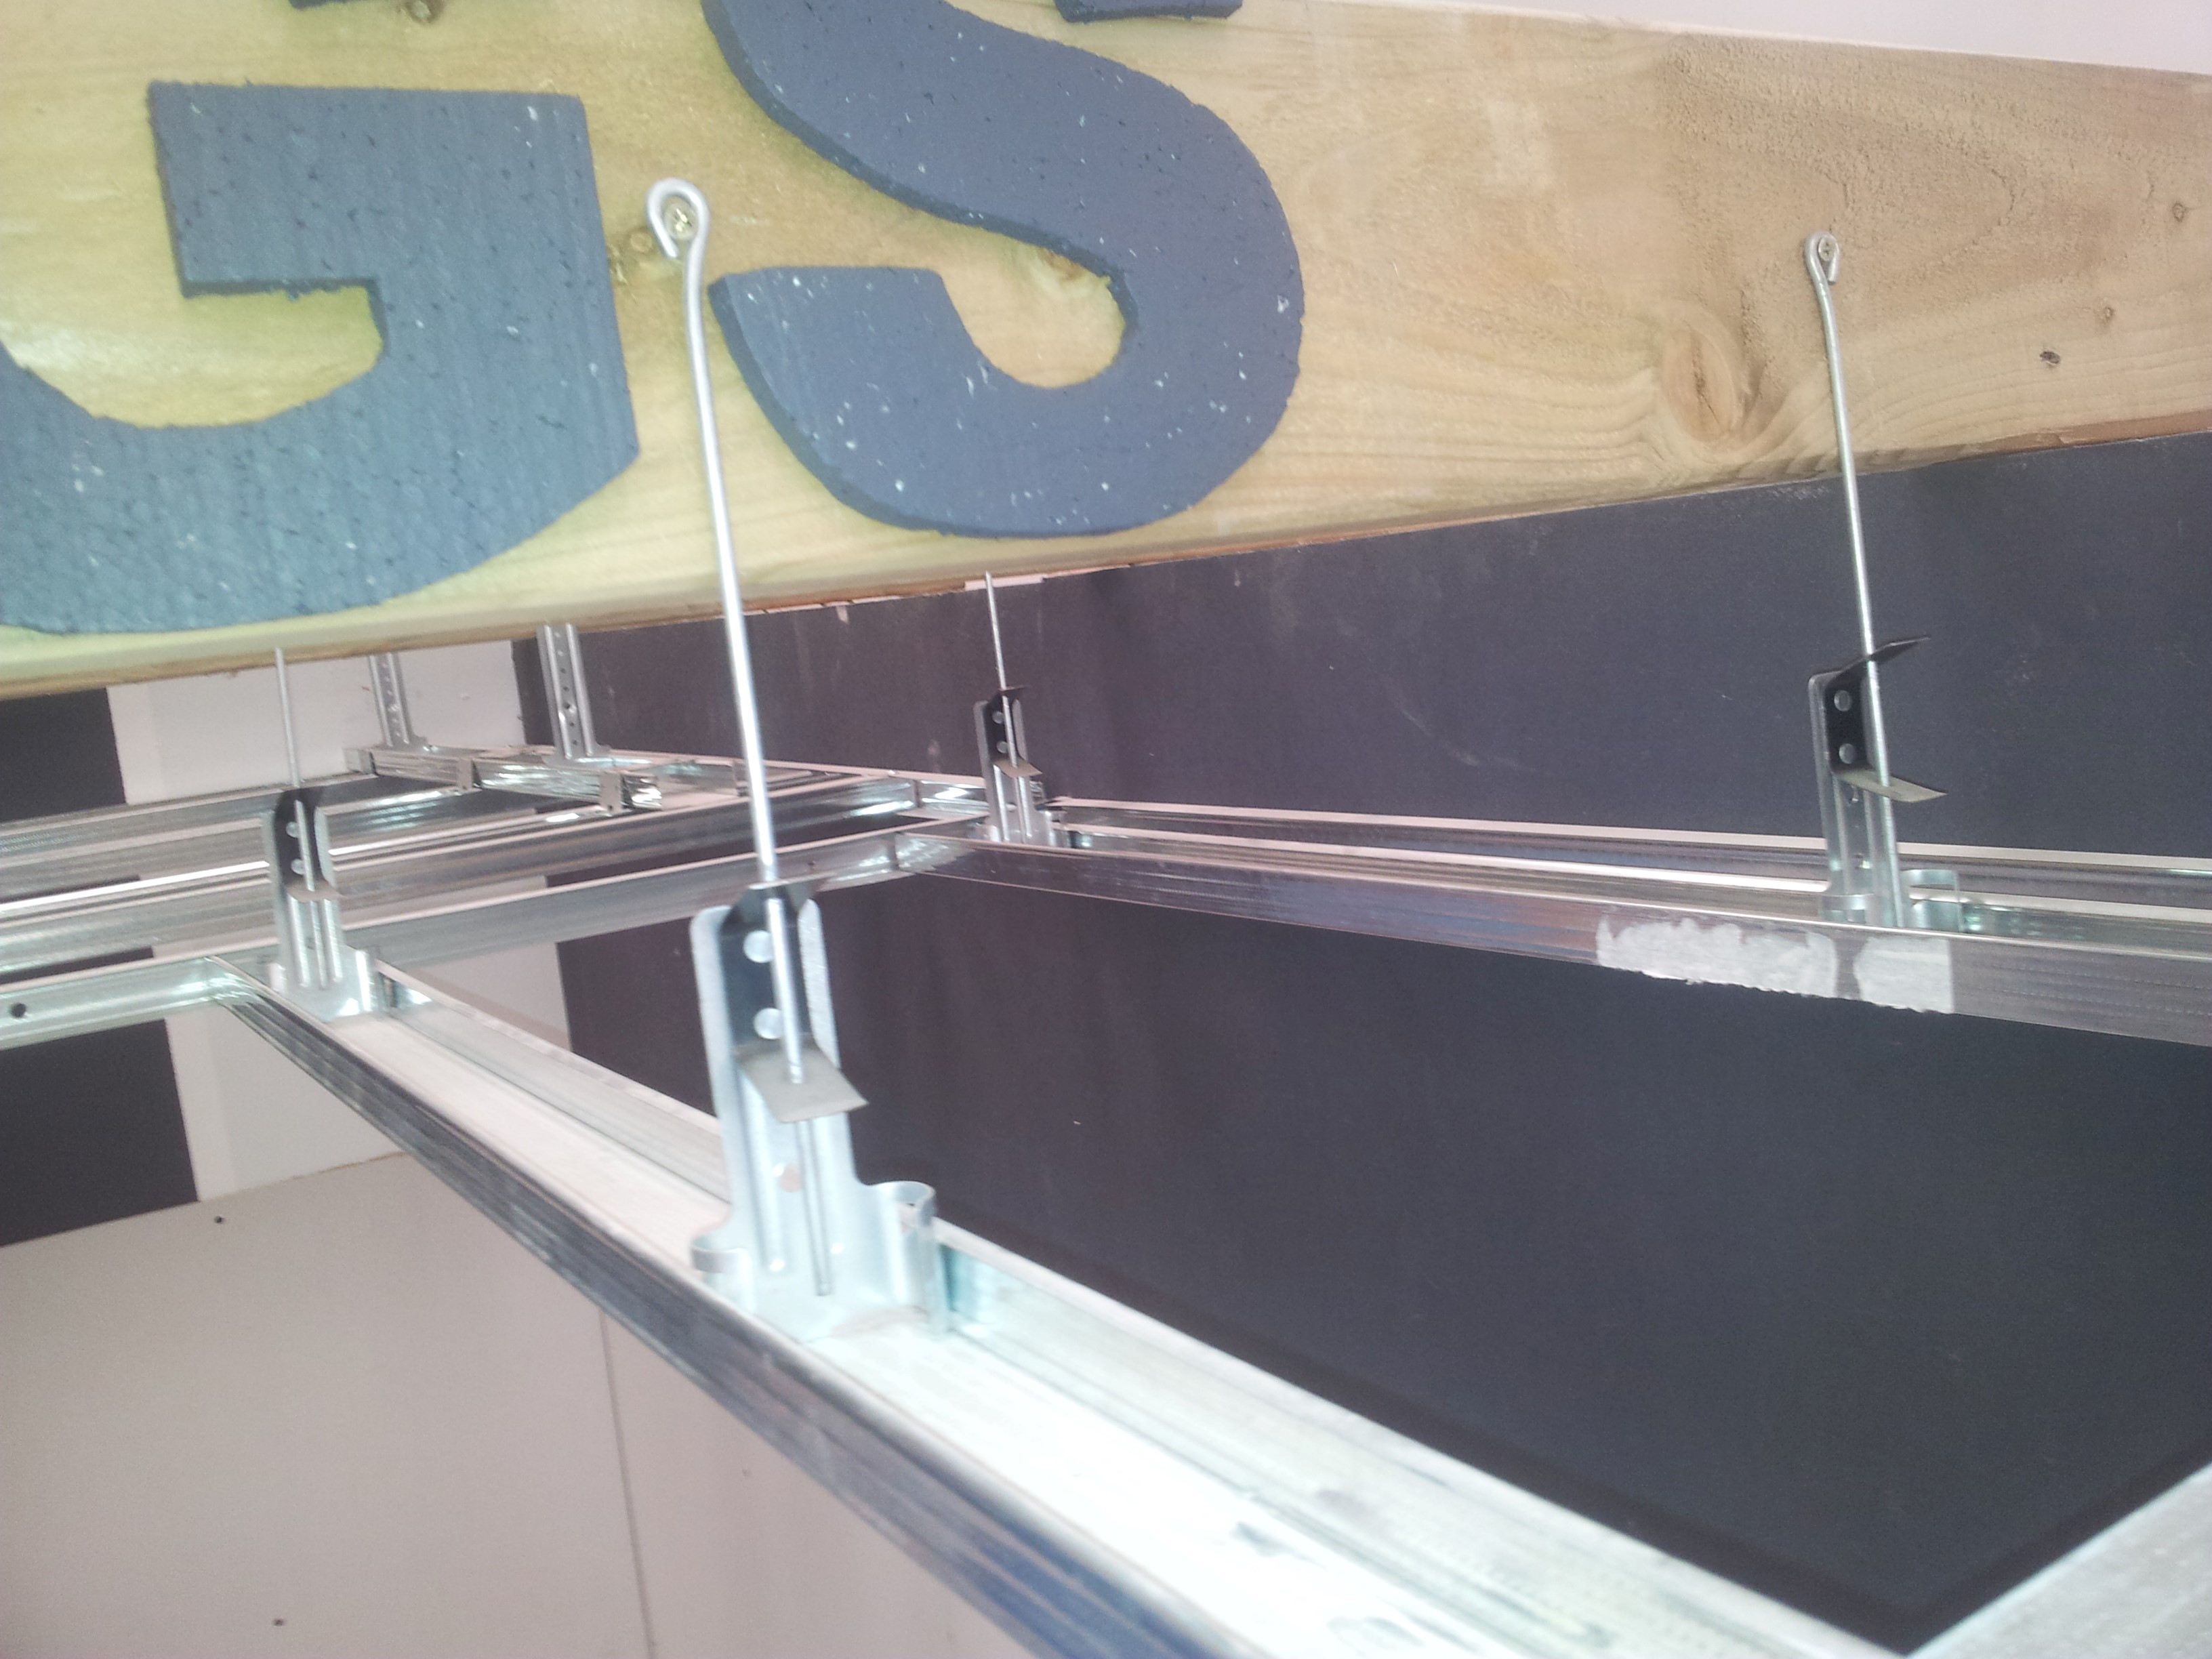
Metal frame ceiling is built with metal profiles, channels, connectors and brackets. For the ceiling grid construction, the most frequently used metal profile CD60 is mounted in a one- or two-level cross. Suspended ceiling hangers are ES brackets or hangers WSO. The ceiling can be lowered with ES brackets for profiles CD60 which are used to lower the ceiling from 75mm to 225mm. ES brackets are attached to joists or battens. To lower the ceiling from 10mm up to 2000mm-3000mm use the ceiling revolving hanger WSO and suspension wire. Attach wire to joists or battens and connect with WSO hanger. In the case of ceilings with fire protection hangers WSO noinius, ES or EL should be used, while for the acoustic ceilings the acoustic hangers.
Hanger WSO noinius Acoustic hanger
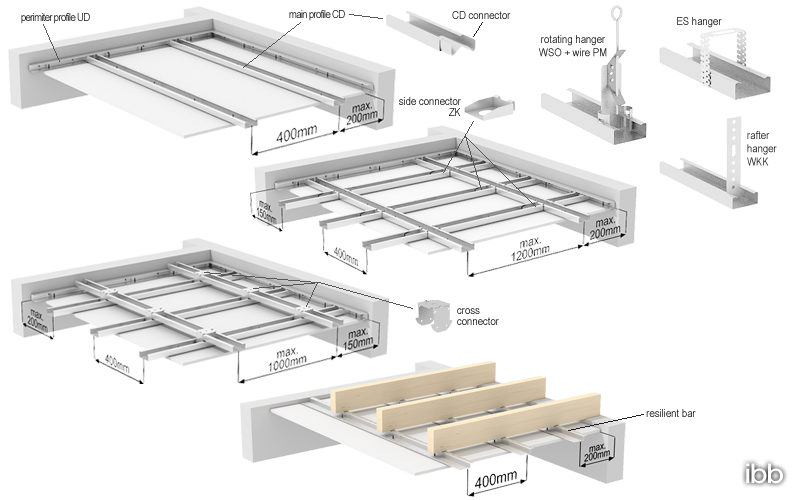
The metal frame ceiling has metal channels attached to the existing joists. Using spirit level or laser, mark guidelines on walls for the new ceiling. Follow the steps for the required ceiling type:
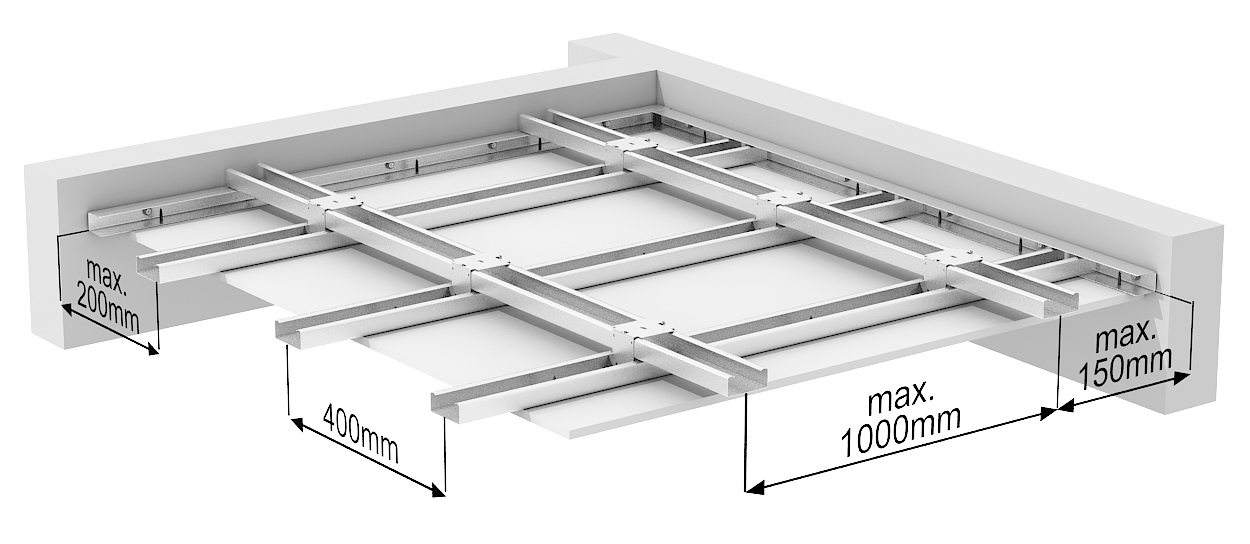
Single metal grid ceiling system- Install wall metal edge channels (perimeter profile UD27 or UD30), then fix brackets to the joints at intervals of 400mm for 2400 x 1200mm plasterboards. Attach channels to the brackets (main profile CD60) and apply plasterboard with metal screws. The bracket height can be altered to level the ceiling appropriately.
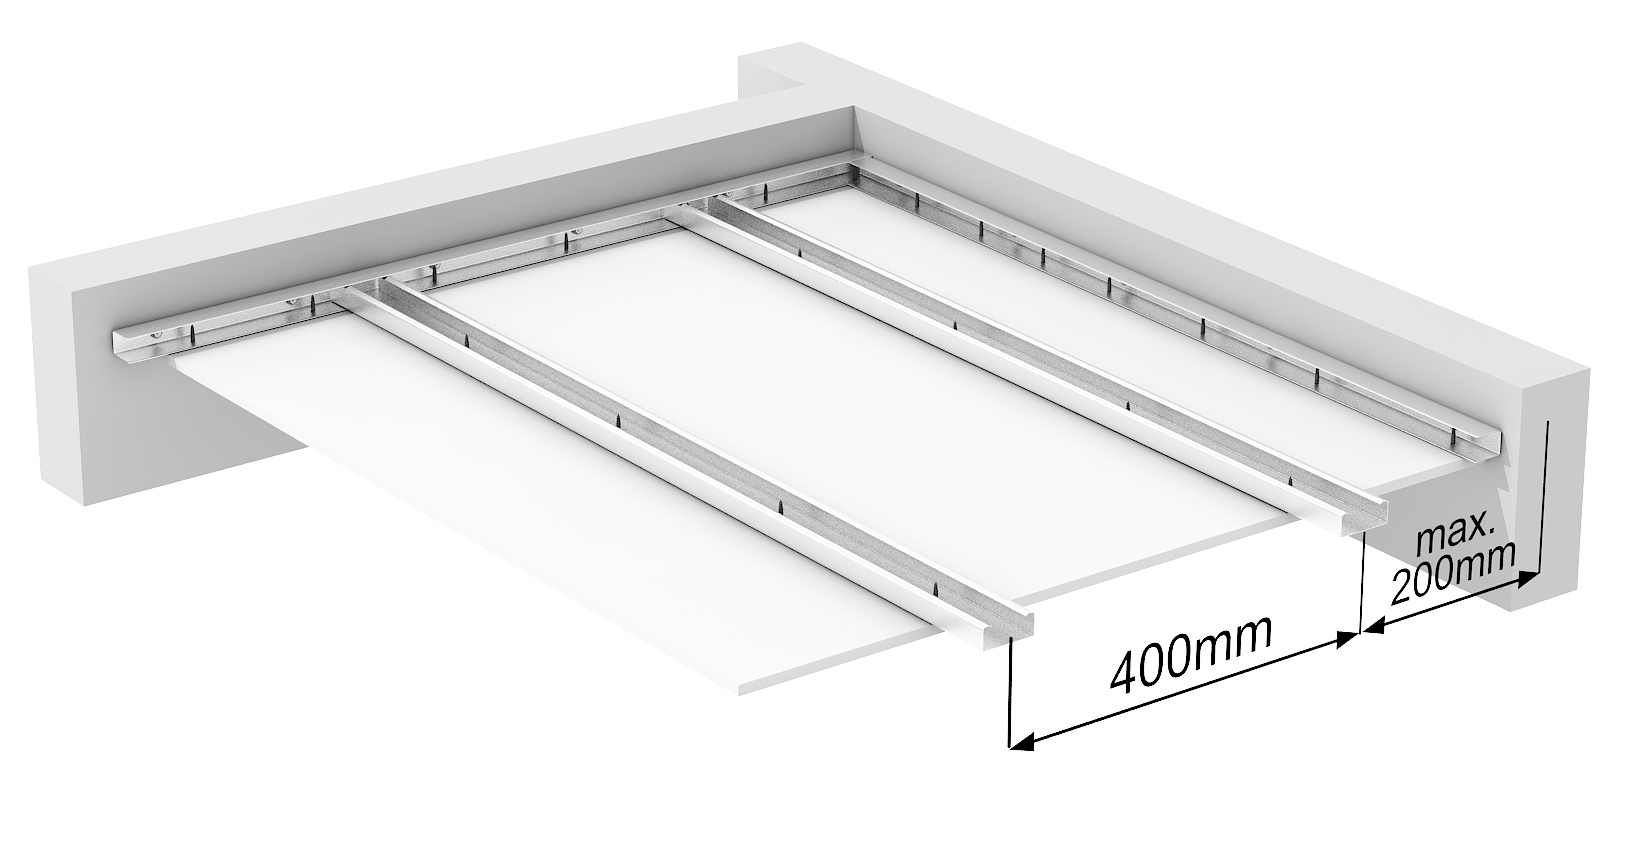
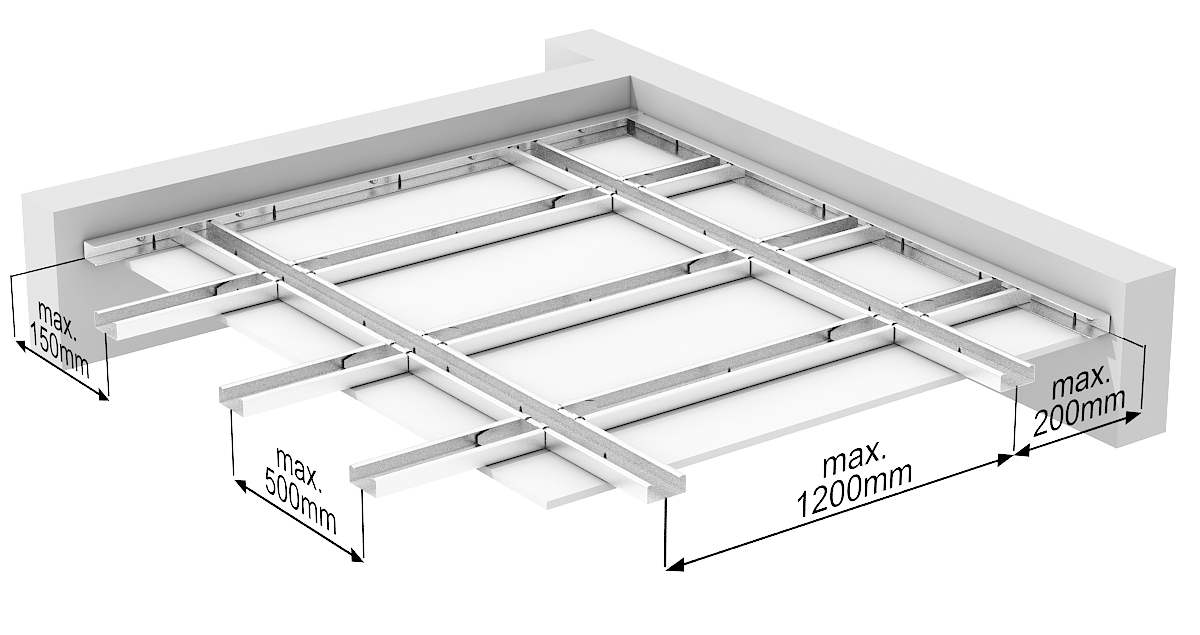
Single metal cross grid ceiling system- Install wall metal edge channels (perimeter profile UD27 or UD30), then fix brackets to the joints at intervals of 400mm for 2400 x 1200mm plasterboards. Install channels (profile CD60) on brackets every 1.2-1.5 meters and add metal channels (profile CD60) every 400mm on the cross brackets. Install plasterboard and dry line. The bracket height can be altered to level the ceiling appropriately.
Single grid suspended ceiling lowered on the ES bracket.
Single grid suspended ceiling lowered on the WSO bracket.
Double metal cross grid ceiling system- Same as the single metal cross grid system but on double metal channels (profile CD60). Such a ceiling system is used for higher loading for double plasterboards. To achieve stronger ceiling construction, use cross-side connectors between main channels (profiles CD60).
Resilient metal grid ceiling system-
Resilient bars are designed to upgrade ceilings to Building Regulations Approved Document E acoustic standards, virtually eliminating movement problems. A resilient metal grid improves the acoustic performance of the suspended ceiling.
Resilient bars are installed directly onto the joists. Plasterboard is installed directly to the resilient bar so there is no connection between the plasterboard and the joists. This allows the resilient bars to vibrate and absorbs sound. This metal bar can provide a sound reduction of 10dB. Install resilient bars every 400mm directly to ceiling joists; the first gap from the wall should have no more than 200mm. Attach to resilient bars with screws.
Acoustic hangers provide the option of resilient suspension. They do a similar job as resilient bars by stopping the direct connection of the plasterboard, which is fitted to the metal grid. Acoustic hangers allow for deeper depth between the suspended ceiling and the ceiling structure, which allows the increased sound insulation. They reduce the airborne noise which gets to adjoining rooms or from the floor above.
| Solution | Ceiling height loss | Performance | Impact improvement | Airbone Sound |
| Acoustic hangers | 85-91mm (ceiling retained) | Good airborne (4db better than resilient bar) | Preferred over resilient bars where impact sound is high | Approx 18dB improvement |
| Resilient bars | 29-35mm (ceiling removed) | Medium airborne | Good | Approx 16dB improvement |
3/. Fitting an amstrong system
Mark a guideline on the walls, attach wall angles and insert tees and cross tees. Suspend tees from the above ceiling using wires that can be adjusted to keep the framework level, then install panels. It is more common in commercial buildings.
WALLS
A stud wall is the most common way to divide rooms. Its framework as with ceilings can be constructed with timber or metal.
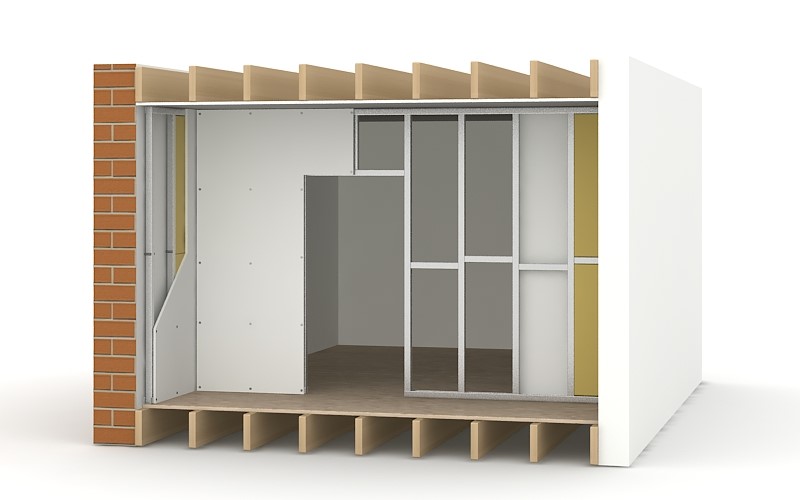
Timber stud wall system
Firstly it is required to choose the appropriate plasterboard for the walls (as per specification)- standard, fire, acoustic, and water moisture. The thickness of plasterboards affects how far apart the stud walls should be positioned. The general rule is that studs should be installed at most 400mm apart from a board that is 9.5mm thick or 600mm if it is 12.5mm thick or 15mm. Taking into account the final finish, use taper-edged plasterboards for dry line finish only or square-edged plasterboards for plaster. How much plasterboard to buy? Calculate the wall’s area and multiply its height by its width. Divide this by the area of one sheet. Buy a little extra to cover for cuts.
Plasterboard types:
To meet various performance requirements, there is a selection of plasterboards available. There are solutions for enhanced moisture, fire, acoustic, impact or thermal performance. The most common are ordinary plasterboards 9.5mm or 12.5mm or fire-resistant plasterboards 12.5mm or 15mm. For special requirements like soundproofing, there are 15mm or 19mm sound block plasterboards available. Plasterboard generally comes in size 1200mm wide to suit the standard 600mm stud spacing. Other widths- 900mm or 600mm are available for specific systems or where space is limited.
We can distinguish between Square edge plasterboard and Tapered edge plasterboard. Tapered edge boards are ideal for jointing or skimming, while the square edge is generally used for textured finishes.
Standard plasterboard- most common, comes in ivory/brown colours, suitable for applications with normal sound levels, structural properties or fire specifications. It can be installed in a double layer.
Vapour shield plasterboard- usually comes with a thin layer of metallic film on the reverse of the sheet. Used for thermal insulation purposes.
Acoustic plasterboard- usually comes in blue, with a higher density core to provide the sound blocking features. To be used with resilient bars in soundproofing metal frame systems, which prevent the passage of sound vibrations.
Fireboard- usually comes in pink colour, consisting of glass fibre and other additives that protect against fire.
Water resistant board- usually green, consists of water repellent additives so can be used in humidity areas- kitchen, bathrooms, wet areas.
Impact plasterboard- very dense core to resist the impact.
Insulation board- expanded polystyrene core, two-component insulation board used for thermal purposes.
In the next step, choose the proper timber. Standard lengths of softwood measure 100x50 mm or 75x50mm. How much wood to buy? Calculate the total length by adding the measurement of the length of each stud, plate and nogging. Buy extra, as timber lengths will not divide exactly as required.
Before installation of the framework, locate existing pipes and circuits to allow for water connections and electricity. Fixing stud wall must be carefully positioned. Generally, it is easier to fix it to the masonry than to another timber wall. Ideally, a new wall should be fixed to the studs in the existing one. In case it is installed between the studs of existing wall position fixings at the top and bottom, into the ceiling and sole plates and into a central nogging. While fixing the wall to the floor and ceiling, remember that the ceiling plate must be attached to the solid structure, ideally directly to the joist. In case where it is not possible to fit noggins every 600mm between two joists and install a ceiling plate to this. Use the same method for the floor.
Ensure that the corners form the exact right angle. The corner is two walls butt-joined. On one wall, an extra stud is added close to the corner, and that is the fixing point for the plasterboard.
- Mark the frame where you would like to position the wall.
- Install the floor plate – position it along the guideline and fix it to the floor.
- Install the wall and ceiling plates- position them along the guidelines and fix to the wall or ceiling with screws.
- Keeping the stud secure to the ceiling and floor plates with 100mm nails inserted diagonally
- Create the door frame by adding the noggin to the width of the doorway and installing it to the door studs. Cut the stud to fit it between the top of the opening and the ceiling plate- secure it at the centre of the doorway width.
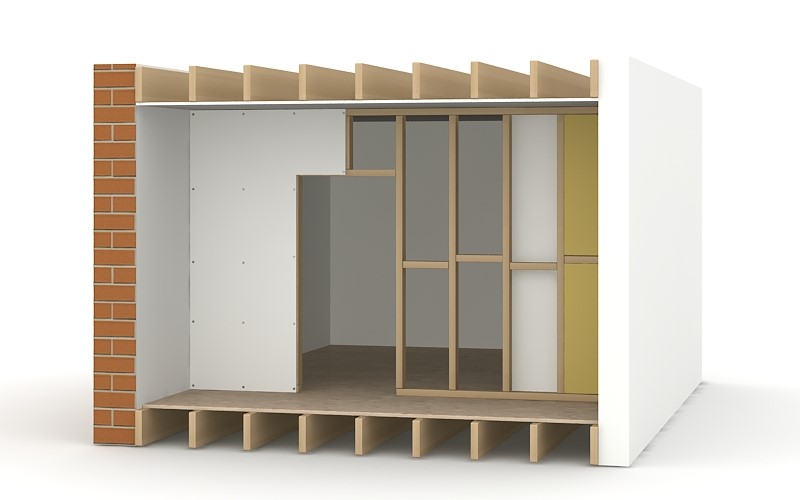
Metal stud wall system
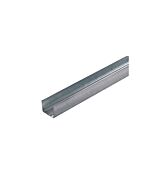
Measure and mark the guidelines on the floor, walls and ceiling where to install the wall channels (profile C), ceilings, and floor tracks (profile U). Mark the opening for the doorway and where to install the vertical channels (profile C). Use the snips to cut the profiles where required. Screw the floor tracks with KSGM screws no more than 600mm apart. It is recommended to use acoustic tape for insulation. Fix the wall channels and secure them with screws placed no more than 600mm apart. Fit the ceiling tracks again with screws 600mm apart. To create the doorway, insert the timber into the floor track for extra support and position the channel for the door head with drywall screws. Insert the vertical channels into the tracks- you can properly fix them with screws. Fix noggins if you require extra support. Attach plasterboards to both sides of the wall.
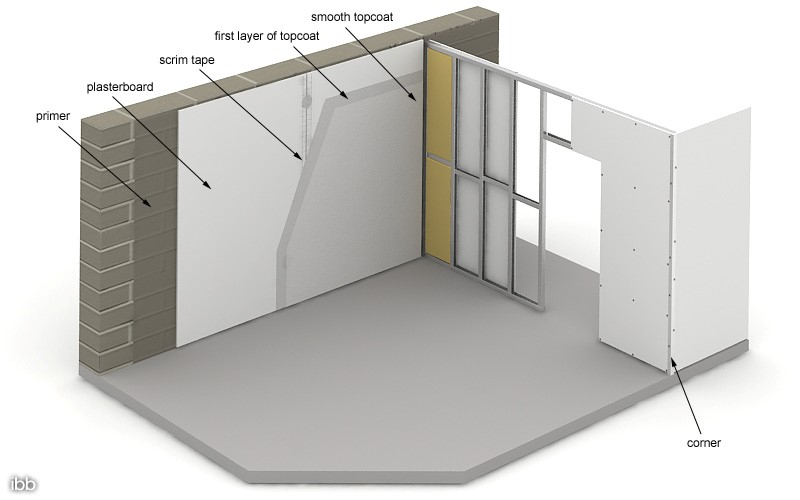
Dry-lining- applying plasterboard
Dry-lining a wall means attaching plasterboard to a wall, which results in a smooth surface ready to decorate. It's quicker and easier to get a perfect finish this way than with wet plaster.
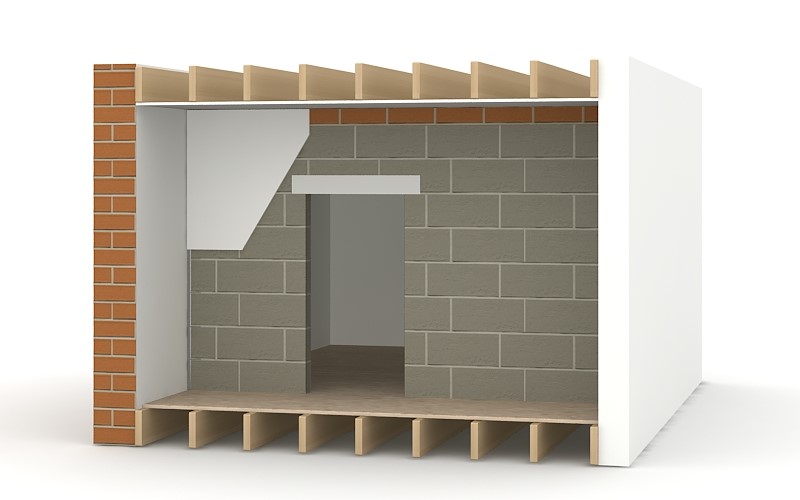
Dry-lining is straightforward. First of all, draw the guide lines on the wall to properly install plasterboards. Allow an extra 10mm for the adhesive. Mark a finish line across the top, allowing 12.5mm for the thickness of the board and 10-15mm for the adhesive.
In case of an uneven wall attach a framework of timber studs or metal channels to it before dry-lining. Fix the plasterboard to the studs or profiles with nails or screws rather than adhesive. You can also fit thermal insulation before fixing the plasterboard or use soundproof plasterboard.
If your wall is levelled, use an adhesive to fix the plasterboard. Apply the adhesive on the wall and stick the plasterboard in line with your guidelines. Use the wooden batten to press the plasterboard against the wall and the self-levelling tool to ensure it is perfectly vertical.
When applying plasterboards to the timber or metal framework, first mark the positions of studs on the floor and ceiling to easily find the fixing points. Cut plasterboard to the right measurements (start from the wall to the centre of the doorway). Position the first plasterboard and secure it with screws. Its edge should run down the centre of the stud above the doorway to avoid cracking. Apply screws every 150mm. Fix into noggings and studs in the sheet's middle and edges. Use the drywall saw to cut the section of the plasterboard that overlaps. If you cover the whole framework, use plaster to fill any cracks or gaps between plasterboards and walls or ceiling.
COMPARISON
METAL FRAME SYSTEM v TIMBER FRAME SYSTEM
DRY-LINING v PLASTERING
- Dry lining is an alternative method to plastering.
- It costs less and is more effective than traditional plastering.
- Metal frame system based on profiles is an alternative to traditional timber wall and ceiling construction.
- Metal frame is quicker and easier to install, while it meets the highest performance requirements. It offers a high strength-to-weight ratio for long- lasting results.
- A metal frame is more effective than a timber one, especially in case of ceilings.
- Metal frame system allows the creation of curves walls and arch ceilings easily.
- In the case of a metal frame system, it is unnecessary to finish the whole surface with plaster; joints are enough.
- Messy job of plastering is not required, which cuts costs and time.
- Timber battens may be a cheaper solution, but the ceiling based on timber batten framework is less resilient to cracks.
- Metal frame systems are up to 50% lighter than timber one, whilst it offers a more sturdy framework for plasterboard to be fixed.
- Resilient metal grid improves the acoustic performance of a suspended ceiling
- Metal profiles and channels are easier to transport. It can be stored outside and installed in any weather conditions.
- Metal profiles and channels are easy to cut on-site, non-flammable and will not rot or twist.
- This is a quicker method of installation than using timber battens.
- Metal stud frameworks enable the incorporation of insulation within the structure and offer the same acoustic performance.
- Metal won’t bend, bow or differ in performance.
- Metal studs are also less heavy than timber which cuts the installation time.
To sum up, dry lining (metal frame system) is a cost-effective solution to building a new internal partition wall or ceiling or improving any existing wall or ceiling.
Related Products
-
![Siniat standard plasterboard TE 1200 x 600 x 12.5 mm]() Siniat standard plasterboard TE 1200 x 600 x 12.5 mm£4.80 / pcs £4.00 / pcs£4.12 / pcs£3.43 / pcs
Siniat standard plasterboard TE 1200 x 600 x 12.5 mm£4.80 / pcs £4.00 / pcs£4.12 / pcs£3.43 / pcs -
![C 50 stud metal profile 2.6m]()
-
![Perforated knurled corner bead 30x30mm 2.5m]()
-
![Ceiling metal profile CD 60 4m]()
-
![Perimeter ceiling profile UD 27 3m]()
-
![Perimeter ceiling profile UD 27 4m]()
-
![Ceiling metal profile CD 60 3m]()
-
![UW50 channel metal profile 4m]()
-
![C 100 stud metal profile 3.0m]()
-
![C 75 stud metal profile 3.0m]()
-
![C 50 stud metal profile 4.0m]()
-
![C 50 stud metal profile 3.0m]()
-
![Ceiling profile cross connector 0.75mm]()
-
![Ceiling channel connector]()
-
![Dryliner Bracket ES 60/175 for CD60 ceiling profile]()